Welcome to the comprehensive guide on analyzing SDS-PAGE for protein analysis, brought to you by Kendrick Labs. SDS-PAGE (Sodium Dodecyl Sulfate-Polyacrylamide Gel Electrophoresis) is a widely used technique in the field of protein research and analysis. It allows for the separation and visualization of proteins based on their molecular weights. In this article, we will delve into the principles of SDS-PAGE, the sample preparation process, running the gel, staining and visualization techniques, protein analysis and quantification, troubleshooting tips, and the vital role SDS-PAGE plays in protein research and various applications. Whether you are a beginner starting your journey in protein analysis or an experienced researcher looking for optimization techniques, this guide will provide you with valuable insights and practical knowledge to enhance your understanding and proficiency in SDS-PAGE analysis.
Introduction to SDS-PAGE and Protein Analysis
What is SDS-PAGE?
SDS-PAGE, short for Sodium Dodecyl Sulfate Polyacrylamide Gel Electrophoresis, is a common technique used to separate proteins based on their size. It involves the use of an electric field to drive proteins through a gel matrix, with the addition of sodium dodecyl sulfate (SDS) to denature and impart a uniform negative charge to the proteins.
Importance of Protein Analysis
Protein analysis is crucial for a wide range of scientific disciplines, including biochemistry, genetics, and pharmaceutical research. Understanding the composition and behavior of proteins helps researchers unravel their functions, study protein-protein interactions, diagnose diseases, and develop therapeutic strategies.
Understanding the Principles of SDS-PAGE
Gel Electrophoresis Basics
Gel electrophoresis is a fundamental technique in molecular biology that separates molecules based on their charge and size. In SDS-PAGE, proteins are loaded onto a polyacrylamide gel and subjected to an electric field, causing them to migrate through the gel at different speeds based on their size.
Role of SDS in Protein Denaturation and Charge Neutralization
SDS acts as a detergent that unfolds, or denatures, proteins by disrupting their three-dimensional structure. It also imparts a uniform negative charge to the denatured proteins, allowing them to migrate through the gel based solely on their size.
Sample Preparation and Loading for SDS-PAGE Analysis
Protein Extraction from Biological Samples
To analyze proteins using SDS-PAGE, they first need to be extracted from the biological samples in which they are present. This typically involves disrupting the cells or tissues through methods like sonication, grinding, or enzymatic digestion, followed by centrifugation to separate the soluble protein fraction.
Sample Buffer Preparation and Protein Denaturation
Once the protein extract is obtained, it is mixed with a sample buffer containing SDS and a reducing agent, such as β-mercaptoethanol or dithiothreitol (DTT). The sample buffer denatures the proteins, breaks down protein-protein interactions, and ensures all proteins are negatively charged.
Loading Techniques for SDS-PAGE Gels
To load the denatured protein samples onto the gel, researchers use a micropipette or a small volume-loading tip. Care must be taken to ensure even loading and avoid introducing air bubbles, which can affect the migration of proteins during electrophoresis.
Running the SDS-PAGE Gel and Electrophoresis
Setting up the Gel Electrophoresis System
Preparing the gel electrophoresis system involves assembling the gel apparatus, placing the gel within the gel box or tank, and filling it with an appropriate electrophoresis buffer. This buffer provides the ions necessary for the electrical current to flow, facilitating the migration of proteins.
Gel Casting and Polymerization
Creating the gel involves mixing the appropriate concentrations of acrylamide and bis-acrylamide monomers, along with a catalyst and a crosslinker. This mixture is poured between two glass plates or into precast gel cassettes, where it polymerizes to form the gel matrix.
Loading and Running the Gel
After the gel has polymerized, the samples are carefully loaded into wells created at one end of the gel using a loading buffer. Electrical current is then applied across the gel, causing the proteins to migrate through the gel matrix. The migration distance is inversely proportional to the size of the proteins, resulting in separation.
Remember to have fun in the lab and always embrace the quirks of working with proteins, as they can sometimes be as unpredictable as a reality TV show contestant. Happy gel electrophoresis!
Staining and Visualization of Protein Bands
When it comes to analyzing proteins on SDS-PAGE gels, it's not enough to just separate them. We also need to see them, like a detective needs a magnifying glass. Fortunately, there are different staining methods to help us visualize those elusive protein bands.
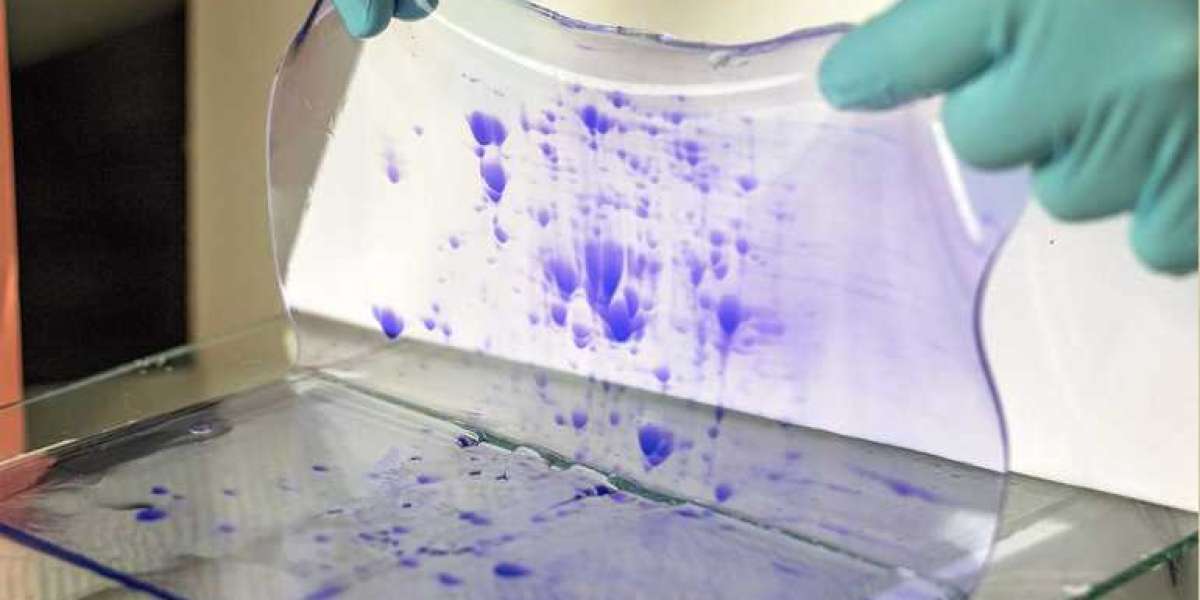
Coomassie Brilliant Blue Staining Method
If you're a fan of vivid colors, you'll love the Coomassie Brilliant Blue staining method. It's like a disco party for your protein bands. Simply immerse your gel in a solution containing Coomassie Brilliant Blue dye, and watch as the bands come to life in a beautiful blue hue. It's important to note that this method is best for detecting higher amounts of proteins.
Silver Staining Method
For those who prefer a more understated approach, the silver staining method is the way to go. It's like black and white photography for proteins. This method uses a series of chemical reactions to deposit silver onto the protein bands, making them visible as dark spots on a light background. The silver staining method is known for its sensitivity, allowing detection of even trace amounts of proteins.
Fluorescent Staining Methods
If you want to take your protein visualization to the next level, consider fluorescent staining methods. It's like giving your proteins their own glow sticks. With fluorescent dyes, you can tag your proteins with different colors, allowing for multiplexing and precise detection. Plus, it's just plain cool to see your protein bands glowing under UV light. Just be careful not to get too carried away with the rave party theme.
Protein Analysis and Quantification from SDS-PAGE Gels
Now that you've successfully stained and visualized your protein bands, it's time to dig deeper and extract useful information from those colorful or glowing lines.
Molecular Weight Determination
One of the key pieces of information you can obtain from SDS-PAGE gels is the molecular weight of your proteins. By comparing the migration distances of your protein bands to those of known molecular weight markers, you can estimate the size of your proteins. It's like playing a molecular weight guessing game, but with science.
Protein Quantification Methods
In addition to knowing the size, you might also want to know how much protein you have in your sample. Fear not, for there are various methods available for protein quantification. From colorimetric assays to fluorescence-based techniques, you can choose the method that suits your experimental needs. Just remember to read the instructions carefully and resist the temptation to taste-test the reagents.
Troubleshooting and Optimization Tips for SDS-PAGE Analysis
Ah, the joys of scientific experiments. Sometimes things don't go as planned, and you need to play detective again to solve the mysteries of subpar gel results. But fret not, we have some troubleshooting tips to help you save the day.
Common Issues and Solutions
Have you ever encountered smearing bands or bands that don't show up at all? These are just a couple of the common issues you might face with SDS-PAGE analysis. But don't despair! We've compiled a list of possible causes and solutions to help you overcome these hurdles. Remember, even Sherlock Holmes had his fair share of mysteries to unravel.
Gel Optimization Techniques
If you're looking to optimize your SDS-PAGE analysis, we've got some tricks up our sleeve. From adjusting the pH of your running buffer to fine-tuning the percentage of acrylamide in your gel, there are several variables you can play with to achieve better separation and resolution. Just don't get too carried away and end up with a gel that's more complicated than a Rubik's Cube.
Importance of SDS-PAGE in Protein Research and Applications
Now that you've mastered the art of SDS-PAGE analysis, you might be wondering why it's such a vital technique in the world of protein research. Well, let us enlighten you.
Role of SDS-PAGE in Protein Characterization
SDS-PAGE is like the superhero of protein characterization. It helps scientists determine important details about proteins, such as their size, purity, and subunit composition. It's like peeling off the layers of a protein onion, revealing its hidden secrets.
Applications in Biomedical Research and Pharmaceutical Industry
The applications of SDS-PAGE extend far and wide, reaching into the realms of biomedical research and the pharmaceutical industry. Whether it's analyzing disease markers, studying protein-protein interactions, or ensuring the quality of therapeutic proteins, SDS-PAGE plays a crucial role in advancing our understanding and application of proteins in these fields. So, next time you're in a lab, remember to give SDS-PAGE a high-five for its contributions to science.
In conclusion, SDS-PAGE is a powerful tool for protein analysis that offers valuable insights into the composition and characteristics of biological samples. By understanding the principles, optimizing the techniques, and effectively analyzing the results, researchers can unlock a wealth of information about proteins and their functions. Whether in academic research or industrial applications, SDS-PAGE remains a cornerstone technique in the field of protein analysis. We hope that this guide has provided you with a comprehensive understanding of SDS-PAGE and its various aspects. Armed with this knowledge, you are now equipped to confidently embark on your own protein analysis experiments and contribute to the advancements in scientific discovery and innovation.
FAQs
Can SDS-PAGE be used to analyze proteins of any size?
SDS-PAGE is suitable for the analysis of proteins within a certain size range. Typically, proteins ranging from approximately 5 kDa to 250 kDa can be effectively separated and visualized using SDS-PAGE. However, larger proteins may experience difficulty penetrating the gel matrix, while very small proteins may not migrate well and may require specialized techniques for analysis.
How can I quantify the amount of protein in my SDS-PAGE gel?
There are several methods available for protein quantification from SDS-PAGE gels. One common approach is to use densitometry analysis, which involves measuring the intensity of protein bands using specialized software and comparing them to a known protein standard. Alternatively, you can extract the proteins from the gel and perform quantitative assays such as Bradford, BCA, or Lowry protein assays.
What are some common troubleshooting tips for SDS-PAGE analysis?
Some common issues encountered during SDS-PAGE analysis include poor resolution, uneven or distorted protein bands, and gel artifacts. To address these problems, it is important to ensure proper sample preparation, verify the quality of reagents and equipment, optimize gel conditions such as pH and percentage, and carefully troubleshoot any potential sources of error such as buffer composition or electrical connections.
How long does it take to run an SDS-PAGE gel?
The running time for an SDS-PAGE gel can vary depending on the size of the gel and the desired resolution. Typically, a standard SDS-PAGE gel is run for 1-2 hours at constant voltage (e.g., 100-150 volts) or until the tracking dye reaches the bottom of the gel. However, larger gels or specialized applications may require longer run times. It is important to monitor the progress of the run and ensure that the gel does not overheat or dry out during the process.
Original Source: https://kendricklabs.blogspot.com/2024/02/a-guide-to-analyzing-sds-page-for.html